Title here
Summary here
Tutorial on creating a hello-world application for the Zynq ARM processor using Xilinx SDK
February 27, 20145 minutes
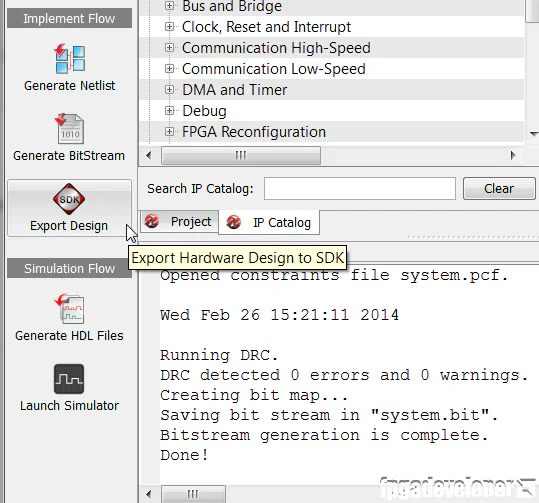
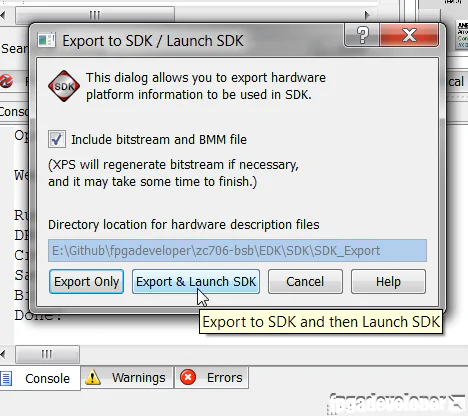
In the previous tutorial titled Creating a project using Base System Builder, we used Xilinx Platform Studio (EDK) to create a hardware design (bitstream) for the Zynq SoC. In this tutorial, we will complete the design by writing a software application to run on the ARM processor which is embedded in the Zynq SoC. Using the Xilinx SDK, we’ll create a simple application that will send the words “hello world” out of the serial port and into your PC serial console. In the next tutorials, we’ll write some applications that will interact with the peripherals we defined in the EDK project.
To perform this tutorial, you will need:
If you didn’t do the previous tutorial about creating an EDK hardware project, you’ll at least need to download the project files and build the project in EDK. The files are available on Github at the link below:
https://github.com/fpgadeveloper/zc706-bsb
What are SDK Workspaces?
An SDK workspace is a folder where you can manage multiple software application(s) for one or more EDK hardware designs. People have different ways of managing their software projects, but I generally like to have one SDK workspace for each EDK project. You can place the workspace anywhere on your machine, but I personally like to organize my projects in a folder structure as follows:
- zc706-bsb: The high-level folder that uses the name of my project.
- EDK: The sub-folder with my EDK project files.
- SDK: The sub-folder with my SDK project files.
In the example above, my project name is “zc706-bsb”. So if you want to follow my way of doing things, create a folder named “SDK” within the “zc706-bsb” project folder (if you downloaded the project files from Github, the SDK folder should already be there). This folder will be your SDK workspace for this tutorial.


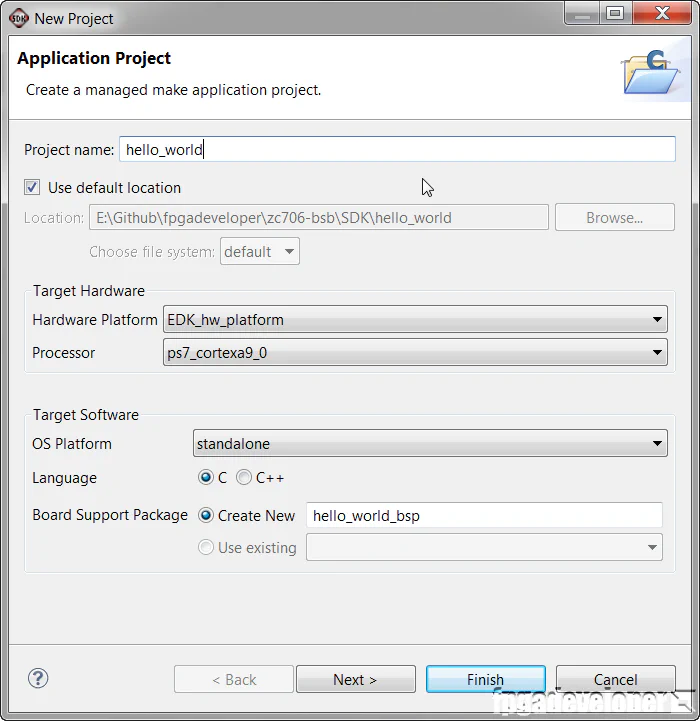
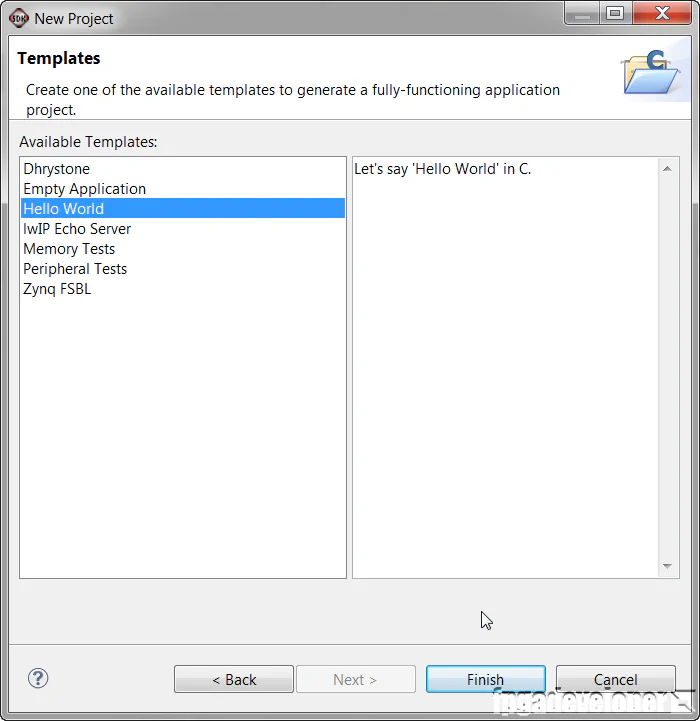
hello_world and click “Next”.
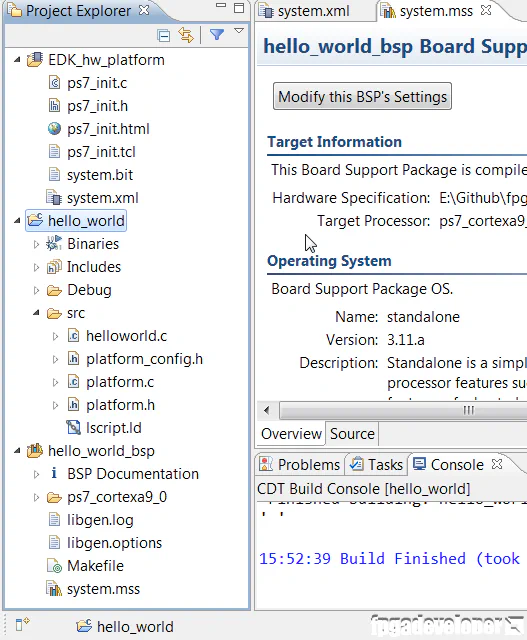
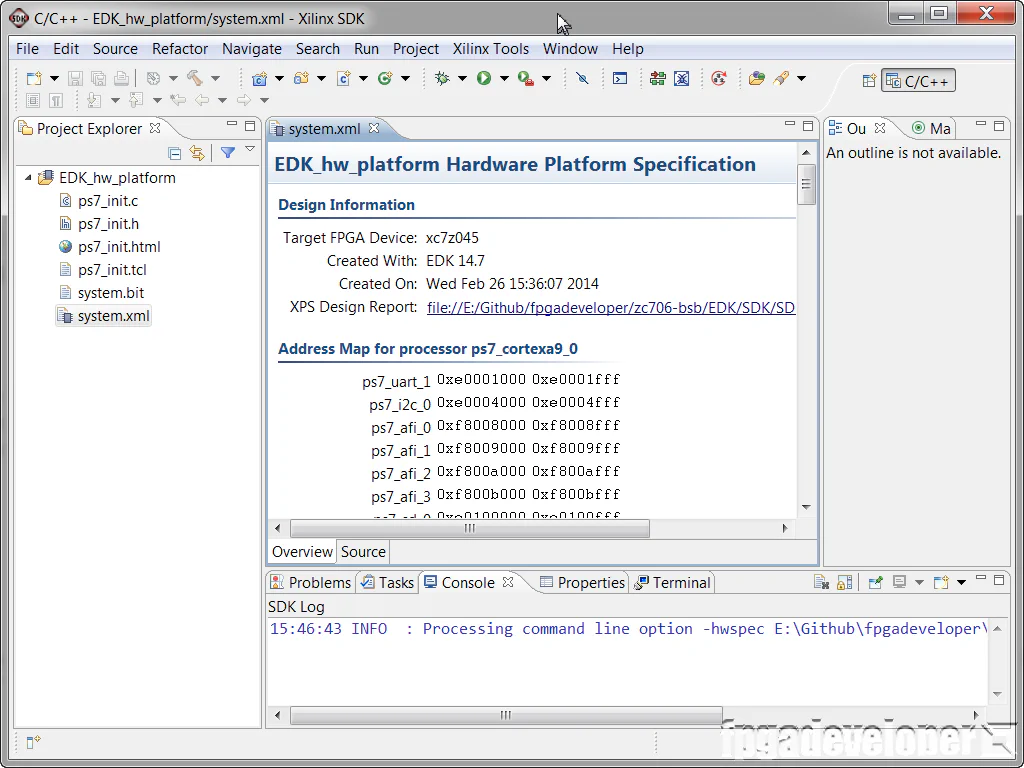
At this point, I suggest you have a poke around in the files that the SDK has created for you. For starters, open the helloworld.c file and have a look at the code we’ll be running. Have a look at the linker script file lscript.ld to see where your code, stack and heap memory will be placed. You can also checkout the files in the hello_world_bsp board support package which is basically a collection of libraries that you can use in your application to take advantage of various peripherals and features of the Zynq. Some of the libraries include USB, watchdog timer, I2C, GPIO, Ethernet MAC and XADC.
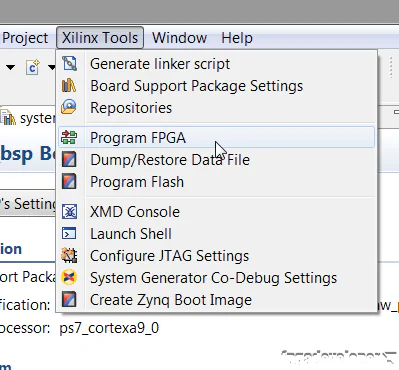
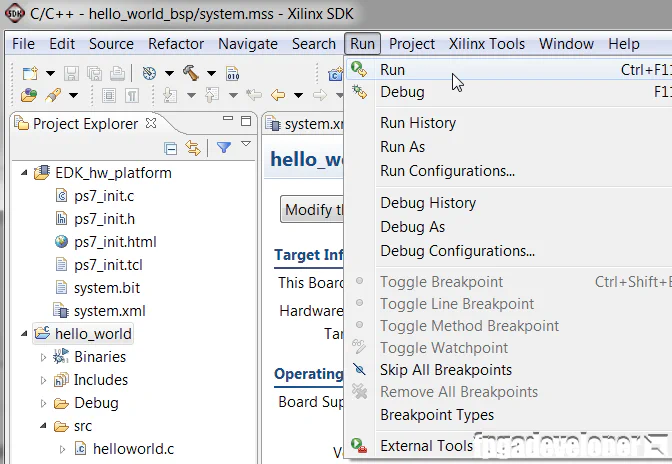
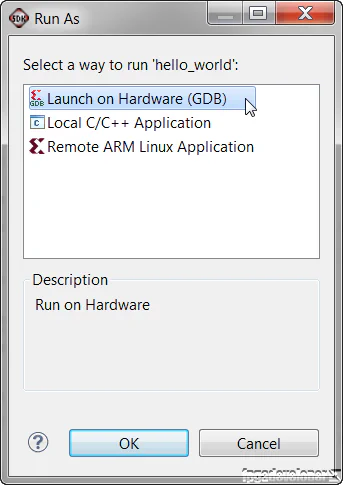
You’re now ready to run the application on the ZC706 evaluation board.
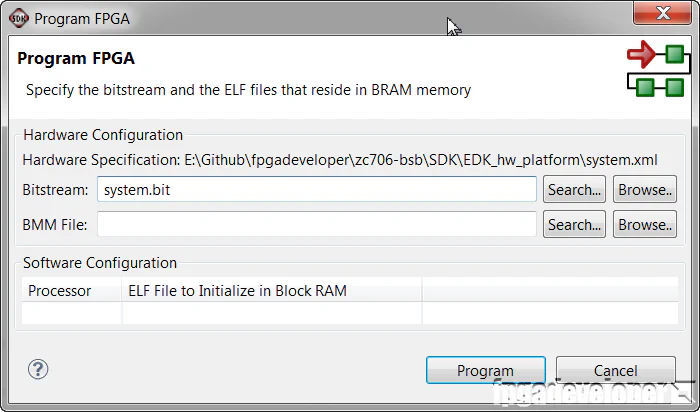
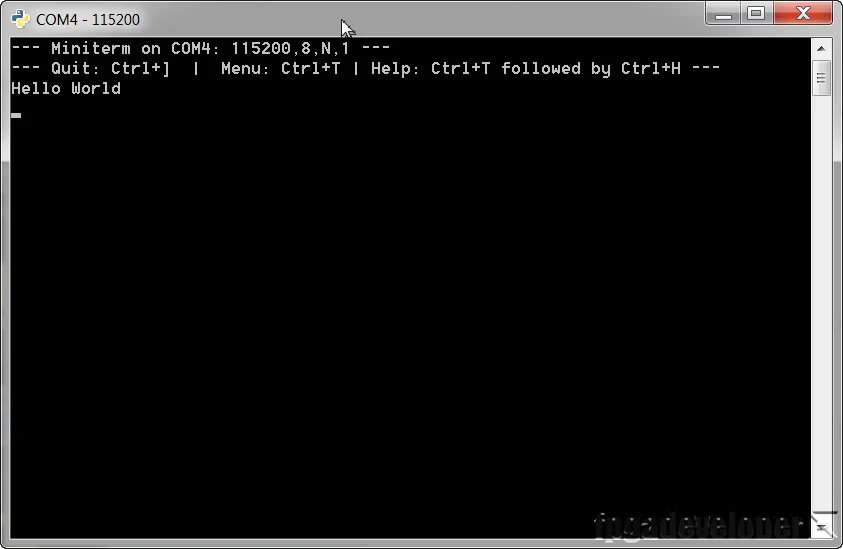
The Zynq will then be programmed with the bitstream and the console window should give you the message: FPGA configured successfully with bitstream `E:/Github/fpgadeveloper/zc706-bsb/SDK/EDK_hw_platform/system.bit`
Now you can try experimenting by modifying the code to do other things. Even though we didn’t place many peripherals in our EDK project, the Zynq is packed with a lot of fixed peripherals that the Base System Builder setup for us. If you want to try out some of these peripherals on your own, just checkout some of the example applications that Xilinx provides in the install folder. \Xilinx\14.7\ISE_DS\EDK\sw\XilinxProcessorIPLib\drivers In this folder you’ll find more examples than you’ll ever have time to try. Good luck!