Title here
Summary here
December 16, 20208 minutes

In this post we’re going to setup a virtual machine with the tools for building PYNQ and we are going to build PYNQ release v2.6 (tool version 2020.1) for the Ultra96 board. We’re going to start with the virtual machine that we setup in the previous post How to Install PetaLinux 2020.1. That VM has Vitis 2020.1 and PetaLinux 2020.1 installed, both of which we will need to build PYNQ. If you want to avoid issues along the way, I highly recommend that you follow that post and recreate the same VM with exactly the same tool versions and OS.
In a terminal on your VM, follow these steps to enable passwordless sudo privilege for your user.
sudo nano /etc/sudoersjeff ALL=(ALL) NOPASSWD: ALL (replace jeff with your
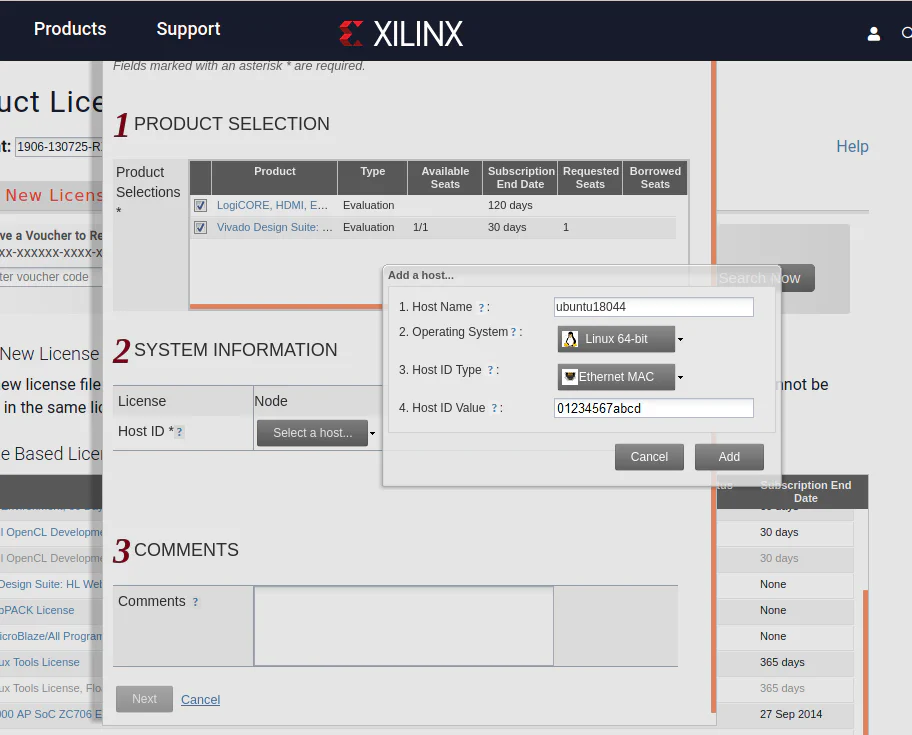
user name).We’re going to get a license that is node-locked to our VM, so we’re going to start by getting the right information to identify our host (the VM).
ubuntu18044, I specified this when creating the VM)01234567abcd)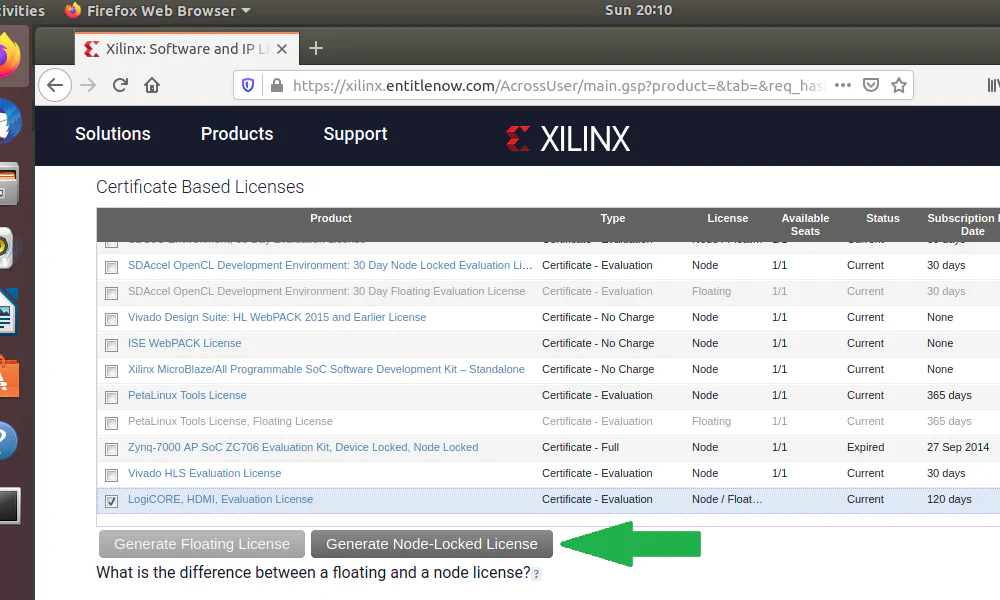
A license file called Xilinx.lic will be emailed to you. Open your email on the VM, and copy
the license file into the ~/.Xilinx directory on the VM. As this is a node-locked license, you
can only use it on this VM.
~/pynq. Create this
directory and clone the Ultra96 PYNQ Git repository into it with these commands:mkdir ~/pynq
cd ~/pynq
git clone https://github.com/Avnet/Ultra96-PYNQ.git
cd Ultra96-PYNQ
git checkout -b image_v2.6.0 origin/image_v2.6.0ultra96v2_bsp.zip file should end up in the ~/Downloads directory. In the terminal window
type the following command to extract the contents of the file into the ~/Downloads directory:unzip ~/Downloads/ultra96v2_bsp.zip -d ~/Downloads~/Downloads/ultra96v2 and where
they now need to be copied:| File | Where to put it |
|---|---|
sensors96b_v2.bsp | ~/pynq/Ultra96-PYNQ/Ultra96 |
sensors96b.bit | ~/pynq/Ultra96-PYNQ/Ultra96/sensors96b |
sensors96b.hwh | ~/pynq/Ultra96-PYNQ/Ultra96/sensors96b |
Use the following commands to copy each of the extracted files to where they need to go:
cp ~/Downloads/ultra96v2/sensors96b_v2.bsp ~/pynq/Ultra96-PYNQ/Ultra96/.
cp ~/Downloads/ultra96v2/sensors96b.bit ~/pynq/Ultra96-PYNQ/Ultra96/sensors96b/.
cp ~/Downloads/ultra96v2/sensors96b.hwh ~/pynq/Ultra96-PYNQ/Ultra96/sensors96b/.cd ~/pynq/Ultra96-PYNQ/Ultra96
ln -s specs/Ultra96_v2.spec Ultra96.spec
ln -s petalinux_bsp_v2 petalinux_bspNote that if you are using the Ultra96v1, then you need to replace the _v2 with _v1 in the
above commands.
~/pynq directory:cd ~/pynq
git clone https://github.com/Xilinx/PYNQ.git
cd PYNQ
git checkout origin/image_v2.6.0cd sdbuild
./scripts/setup_host.shsource ~/Xilinx/Vitis/2020.1/settings64.sh
source ~/petalinux/2020.1/settings.shpetalinux-util --webtalk offmake checkenvYou should expect the build process to last for several hours. One reason why it takes so long is that by default it will build the PYNQ images for three extra boards: PYNQ-Z1, PYNQ-Z2 and ZCU104. According to this forum post, we have to build PYNQ for the PYNQ-Z2 but we can remove the other two boards from the repository to save on build time:
git rm to remove the PYNQ-Z1 and ZCU104 board files, and then locally commit the changes.
Note that we need to locally commit the changes, because the build process uses the most recent
git commit and ignores any uncommited changes to the repository.cd ~/pynq/PYNQ/boards
git config --global user.email "[email protected]"
git rm -r Pynq-Z1
git rm -r ZCU104
git commit -m "removed board files for pynq-z1 and zcu104"make to launch the build. The build script expects you to pass a variable called BOARDDIR whose
value is the path to the board files for which you want to build PYNQ. In our case, this path
must be set to the location of our Ultra96 PYNQ repository: ~/pynq/Ultra96-PYNQ. Run the following
commands to launch the build:make clean
make BOARDDIR=~/pynq/Ultra96-PYNQIf the build completes successfully, you will find an SD card image here:
~/pynq/PYNQ/sdbuild/output/Ultra96-2.6.img
dmesg command in the terminal. The
SD card should be found at the end of the log, and it’s device name should be something
like /dev/sdX where X is a letter such as a,b,c,d, etc. In the following commands,
I will assume that the SD card is /dev/sdX, but you will need to replace the X with
the right letter for your SD card.sudo dd if=~/pynq/PYNQ/sdbuild/output/Ultra96-2.6.img of=/dev/sdX status=progress bs=4MWhen you run the above command, you must be absolutely certain that you are using the correct
device name for the SD card. If you don’t use the correct device name, you risk writing over
something else - such as your main hard drive. If you’re not sure, try running dmesg
before and after plugging in the SD card, and watch for the change.
Now all that is left to do is to plug the SD card into the Ultra96 and power it up. We’ll go through how to use PYNQ for Ultra96 in a future post, but for now you can read about it in the documentation.