In this video I create a simple Vivado design for the MYIR Z-turn Zynq SoM and we run a hello world application on it, followed by the lwIP echo server. We connect the Z-turn to a network, then we use “ping” and “telnet” to test the echo server from a PC that is connected to the same network.
If you want to try it out yourself, download the SD card boot files here:
The SoM
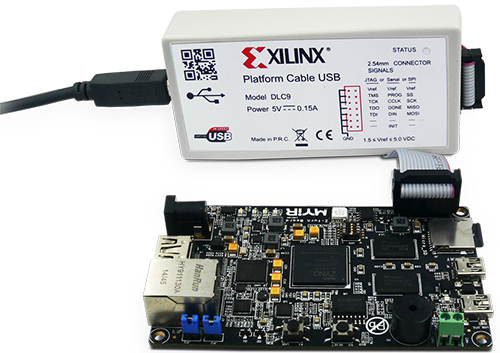
The Z-turn stands out in the market of Zynq based SoMs because it’s got a few features that the others don’t; of most interest to me being the accelerometer and the HDMI interface. My first impressions of the board were good, it has a clean look, it’s compact and it has most features I’d normally be looking for. But there was one thing I didn’t like: the JTAG header. They’ve chosen the big 100mil pitch header for the old Platform Cable USB. Most Xilinx dev boards nowadays have a smaller JTAG header, so none of my JTAG programmers can actually plug into this. Anyway, if I do anything serious with this board I’ll definitely have to wire up an adapter.

Board files
Another little issue I found was with the support. I couldn’t find the board preset files anywhere on the MYIR website, nor on the CD that comes with the board. So in the end I found Sergiusz Bazanski’s Github repo and his own hand-coded board files for the Z-turn:
https://github.com/q3k/zturn-stuff
You’ll need to install those board files before going through the example. Thanks Sergiusz!
USB-UART trap
Something I emphasized in the video and I want to re-iterate here; the USB-UART on the Z-turn is connected to the PS UART1 (ONE) peripheral. That’s important to know because the PS UART0 (ZERO) peripheral is also enabled by Sergiusz' board preset, and it’s this peripheral that the SDK will choose by default for STDIO. This means that when you create a BSP in the SDK, it will select the PS UART0 for your STDIO - not your USB-UART. So you have to manually change it, or you can expect nothing to come up on your UART console window.
Ethernet PHY issue
When trying to get the lwIP echo server running, be aware that the Z-turn has an AR8035 Atheros Ethernet PHY. The lwIP driver doesn’t contain code for properly configuring that PHY, instead it’s designed for TI and Marvell PHYs. In this video, I show you how to modify the lwIP driver so that it does properly configure the PHY. Here is the code snippet for that:
 // Enable RGMII TX clock delay in the AD8035 PHY
    XEmacPs_PhyWrite(xemacpsp,phy_addr, 0x1D, 0x05);
    XEmacPs_PhyWrite(xemacpsp,phy_addr, 0x1E, 0x0100);
    // Enable RGMII RX clock delay in the AD8035 PHY
    XEmacPs_PhyWrite(xemacpsp,phy_addr, 0x1D, 0x0);
    XEmacPs_PhyWrite(xemacpsp,phy_addr, 0x1E, 0x8000);
Here is the name of the file that needs to be modified:
\echo_server_bsp\ps7_cortexa9_0\libsrc\lwip141_v1_9\src\contrib\ports\xilinx\netif\xemacpsif_physpeed.c
As you can see from the code, the main issue is the configuration of the RGMII TX and RX clock delays. The Zynq GEM expects both of those delays to be enabled in the PHY. The lwIP code actually tries to enable those delays, but it’s writing to the wrong registers because it’s expecting a Marvell PHY, not an Atheros PHY. If we don’t use the above code then we get bad timing on the RGMII interface and the echo server wont work.
Great hardware, lacks support
Overall, I like the board but the support you find online is limited. The price is great, so if you particularly need a Zynq SoM with HDMI, then yes I’d recommend this board.