Title here
Summary here
Steps to update the Kria SoM boot firmware for Ubuntu 22.04 and the latest PYNQ release
November 11, 20226 minutes

In the previous post we setup the Kria KV260 Vision AI Starter Kit for PYNQ under Ubuntu 20.04.3. Now we would like to update our Kria SoMs boot firmware so that we can boot the newer Ubuntu 22.04 and use the latest PYNQ release for Kria. In this post we’ll go through the steps for updating the boot firmware of your Kria SoM.
Just for clarity, the table below shows the Kria Ubuntu images that are currently available and the version of boot firmware that is required to boot them. My particular board seems to have boot firmware 2021.1 which limits it to Ubuntu 20.04.3 and thus an older release of PYNQ; hence I need to update.
| Kria Ubuntu image | Required boot firmware |
|---|---|
| Ubuntu Desktop 22.04 LTS | 2022.1 Boot FW Update |
| Ubuntu Desktop 20.04.3 LTS | 2021.1 Boot FW Update |
We’re going to follow the Kria boot firmware update process and we’re going to do it directly from Ubuntu on the Kria platform (ie. not from a desktop PC). I’m going to assume that you have setup Ubuntu 20.04.3 as we did in the previous post.
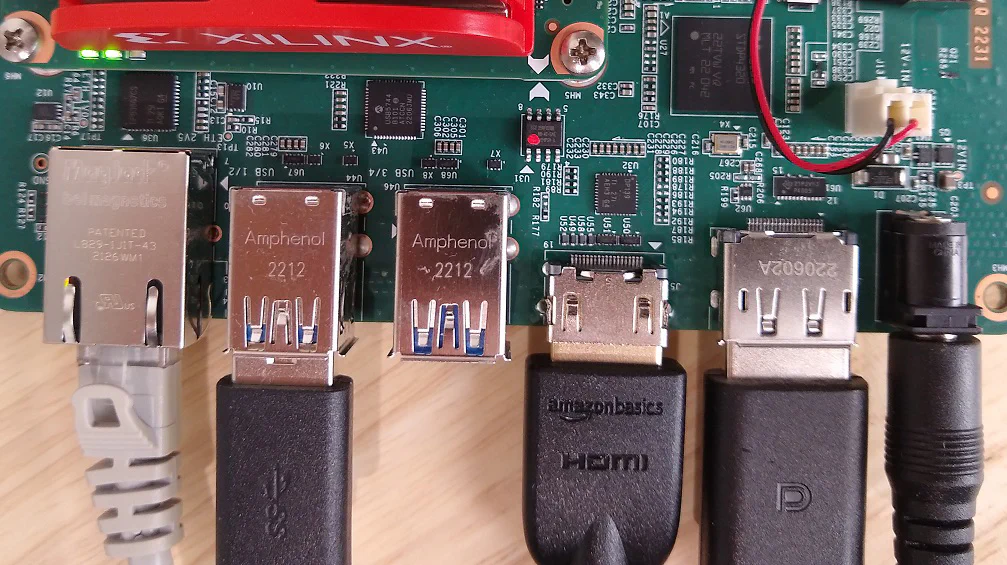
Connect keyboard, mouse and monitor to your Kria, as well as an Ethernet cable to your network router.
Power up the Kria and log into Ubuntu.
Open up the Firefox browser that should be installed by default in Ubuntu. It will be easier if you open up this post in your browser on the Kria, that way you can more easily follow the instructions and use the links.

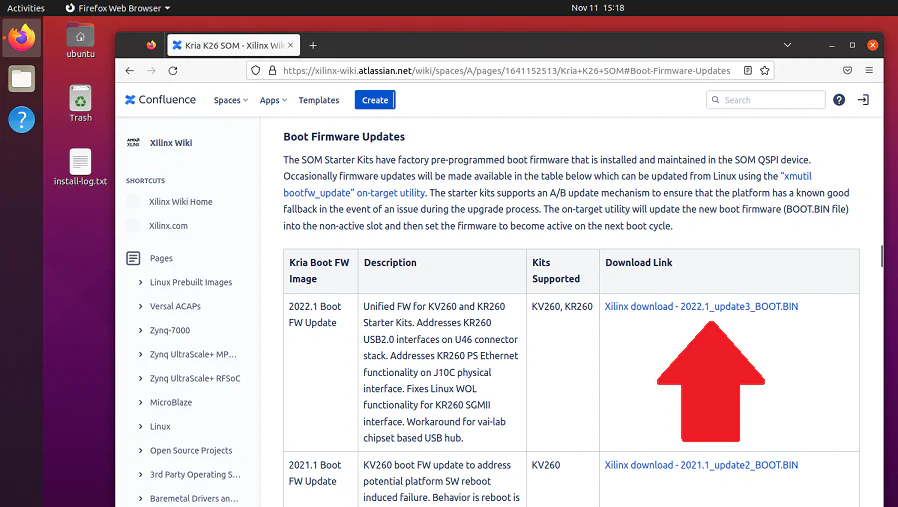
Follow this link to the
Kria Boot firmware updates
and then use the link on the table in that page to download
2022.1_update3_BOOT.BIN
(or the actual firmware version that you need). I’ve put the link above, for the version that I’ve downloaded, however note
that it may not be relevant in the future, and may not be the version that you need. You will have to login to the Xilinx
website to download the file, so have your login credentials ready.
The file should be found in /home/ubuntu/Downloads/ and the filename is BOOT_xilinx-k26-starterkit-v2022.1-09152304_update3.BIN.
We want to rename the file to BOOT.BIN, so open up a terminal window by pressing Ctrl-Alt-T and run these commands:
cd /home/ubuntu/Downloads
mv BOOT_xilinx-k26-starterkit-v2022.1-09152304_update3.BIN BOOT.BIN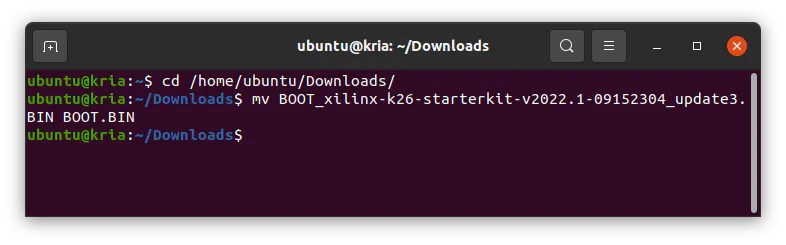
sudo xlnx-config --xmutil bootfw_status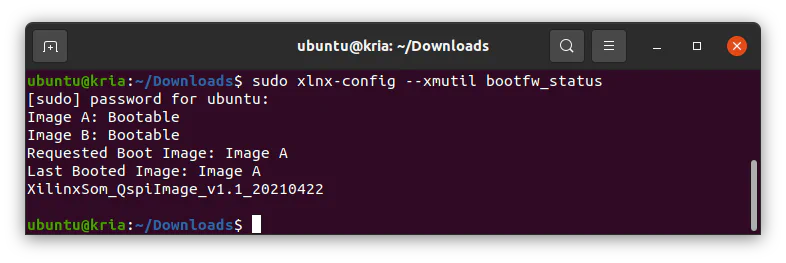 Note from the output that we are currently booting from partition A. Yours might be different, but it is
important to note this because we will be writing our updated firmware to the other partition and wanting
to boot from it instead.
Note from the output that we are currently booting from partition A. Yours might be different, but it is
important to note this because we will be writing our updated firmware to the other partition and wanting
to boot from it instead.
xmutil to update the firmware on our Kria SoM:sudo xlnx-config --xmutil bootfw_update -i BOOT.BINIt will take a few minutes because it is burning the file to the Kria SoM’s QSPI flash.
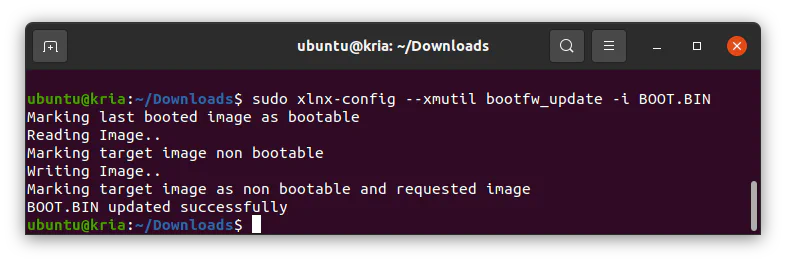
Once that’s finished, we need to hard reset the Kria, either by power cycling the board, or by pressing the “RESET” pushbutton. I just shut everything down in Ubuntu and pressed the RESET pushbutton.
Log back into Ubuntu, open up a terminal window Ctrl-Alt-T, and run this command to confirm that the new firmware
resulted in a successful Linux boot:
sudo xlnx-config --xmutil bootfw_update -vsudo xlnx-config --xmutil bootfw_status
Now that we have the right boot firmware on the Kria SoM, I just want to make sure that we can boot Ubuntu 22.04.
Download Ubuntu for Kria and make sure you pick version 22.04 which on this day of writing is labelled as a “pre-production release”.
Extract and write the image to an SD card (I’m using a new SD card so that I can keep Ubuntu 20.04.3 and the PYNQ install on my current SD card).
Plug the SD card into the Kria and power it up.
So I have been able to verify that I can boot up Ubuntu 22.04 on the Kria KV260 Vision AI Starter Kit by updating the boot firmware in the Kria SoM. At this point we have updated the firmware and confirmed that it was successful. If you’re not interested in PYNQ, you can stop here but I’m going to finish what I started in the last post and get the latest release of PYNQ installed.
As with any fresh Linux install, we want to start by updating the system. Unlike in the last post,
I didn’t have to disable unattended-upgrades to run these commands. Perhaps it’s a difference with Ubuntu 22.04
or perhaps I just gave the Kria more time to empty the update queue.
Ctrl-Alt-T) and run these commands:sudo apt update
sudo apt -f install
sudo apt full-upgrade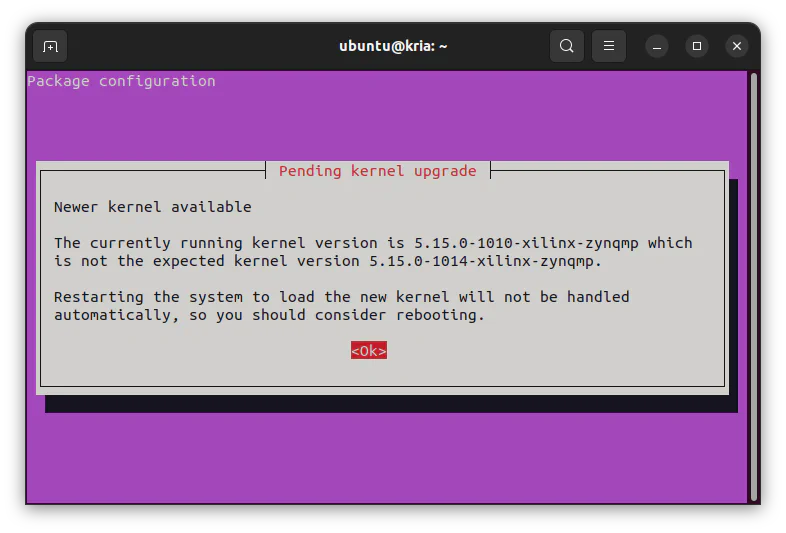
At the end of the updates, I got this message saying that a new kernel was available and that a reboot was required. I closed everything down and power cycled the board.
xlnx-config snap (note that we use the 2.x channel this time):sudo snap install xlnx-config --classic --channel=2.xxlnx-config.sysinit command:sudo xlnx-config.sysinitYou will have to answer “Yes” to a lot of questions after running that command.
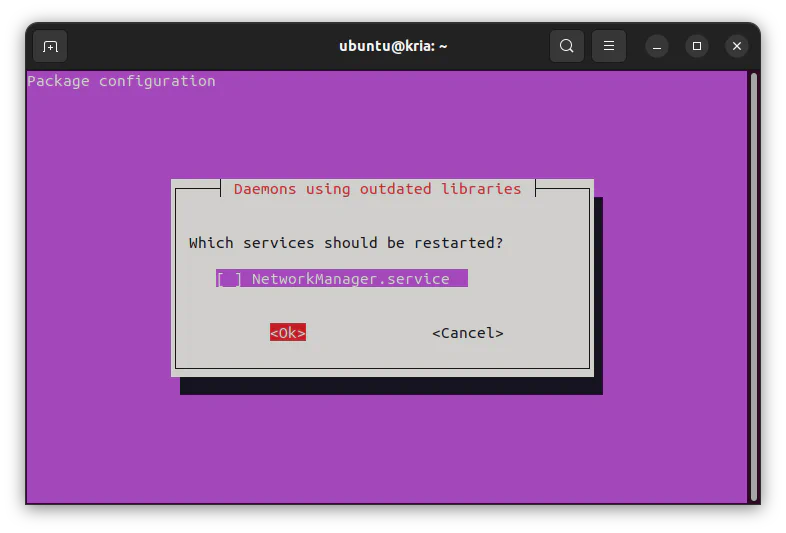
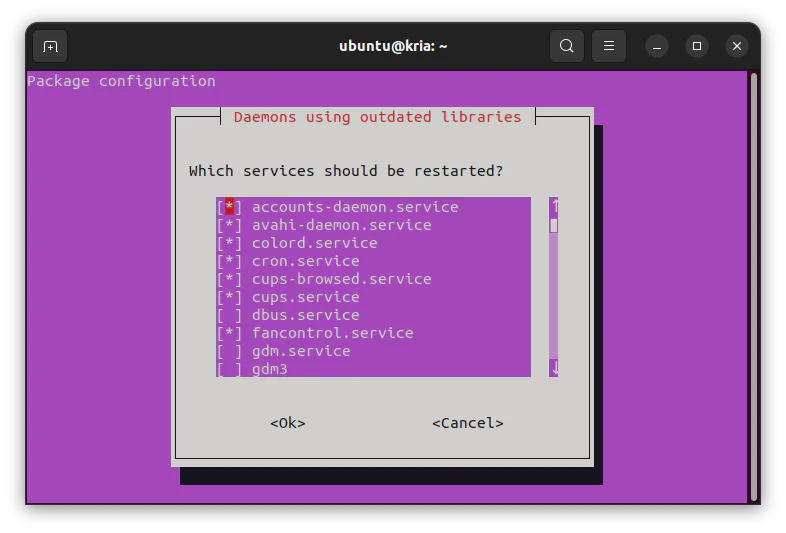
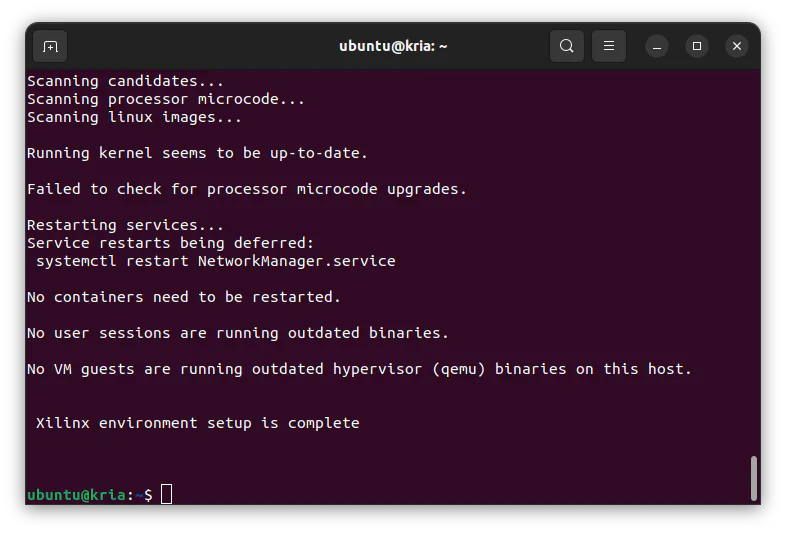
At the end of that, I got this message asking which services should be restarted. I just left the default selection and pressed OK. Eventually it completed, leaving me with the screen below.
Finally we can install the
latest release of PYNQ.
Clone the Kria PYNQ git repository, cd into the directory, and checkout release v3.0:
git clone https://github.com/Xilinx/Kria-PYNQ.git
cd Kria-PYNQ
git checkout tags/v3.0Before running the install script, I have found it necessary to remove a couple lines from the script which seem to be causing issues. There is a pull request open for this but it was not merged into release v3.0, and is still not merged into the main branch at the time of writing this.
install.sh file in a text editor.# Purge libdrm-xlnx-dev to allow `apt upgrade`
apt-get purge -y libdrm-xlnx-dev
apt-get purge -y libdrm-xlnx-amdgpu1After modifying the install script, you should be able to run the install script without issues.
sudo bash install.sh -b KV260To finish up you can test out Jupyter notebooks from your desktop PC and you can setup Samba for sharing files between your Windows PC and the Kria. This is all described in the previous post.
Next week I’m going to design a custom PYNQ overlay for the Kria and get images out of the AR1335 image sensor connected to J8 (bypassing the ISP). That should be fun.