Title here
Summary here
December 2, 20196 minutes

Update 2020-02-07: Missing Link Electronics has released their NVMe Streamer product for NVMe offload to the FPGA, maximum SSD performance, and they have an example design that works with FPGA Drive FMC!
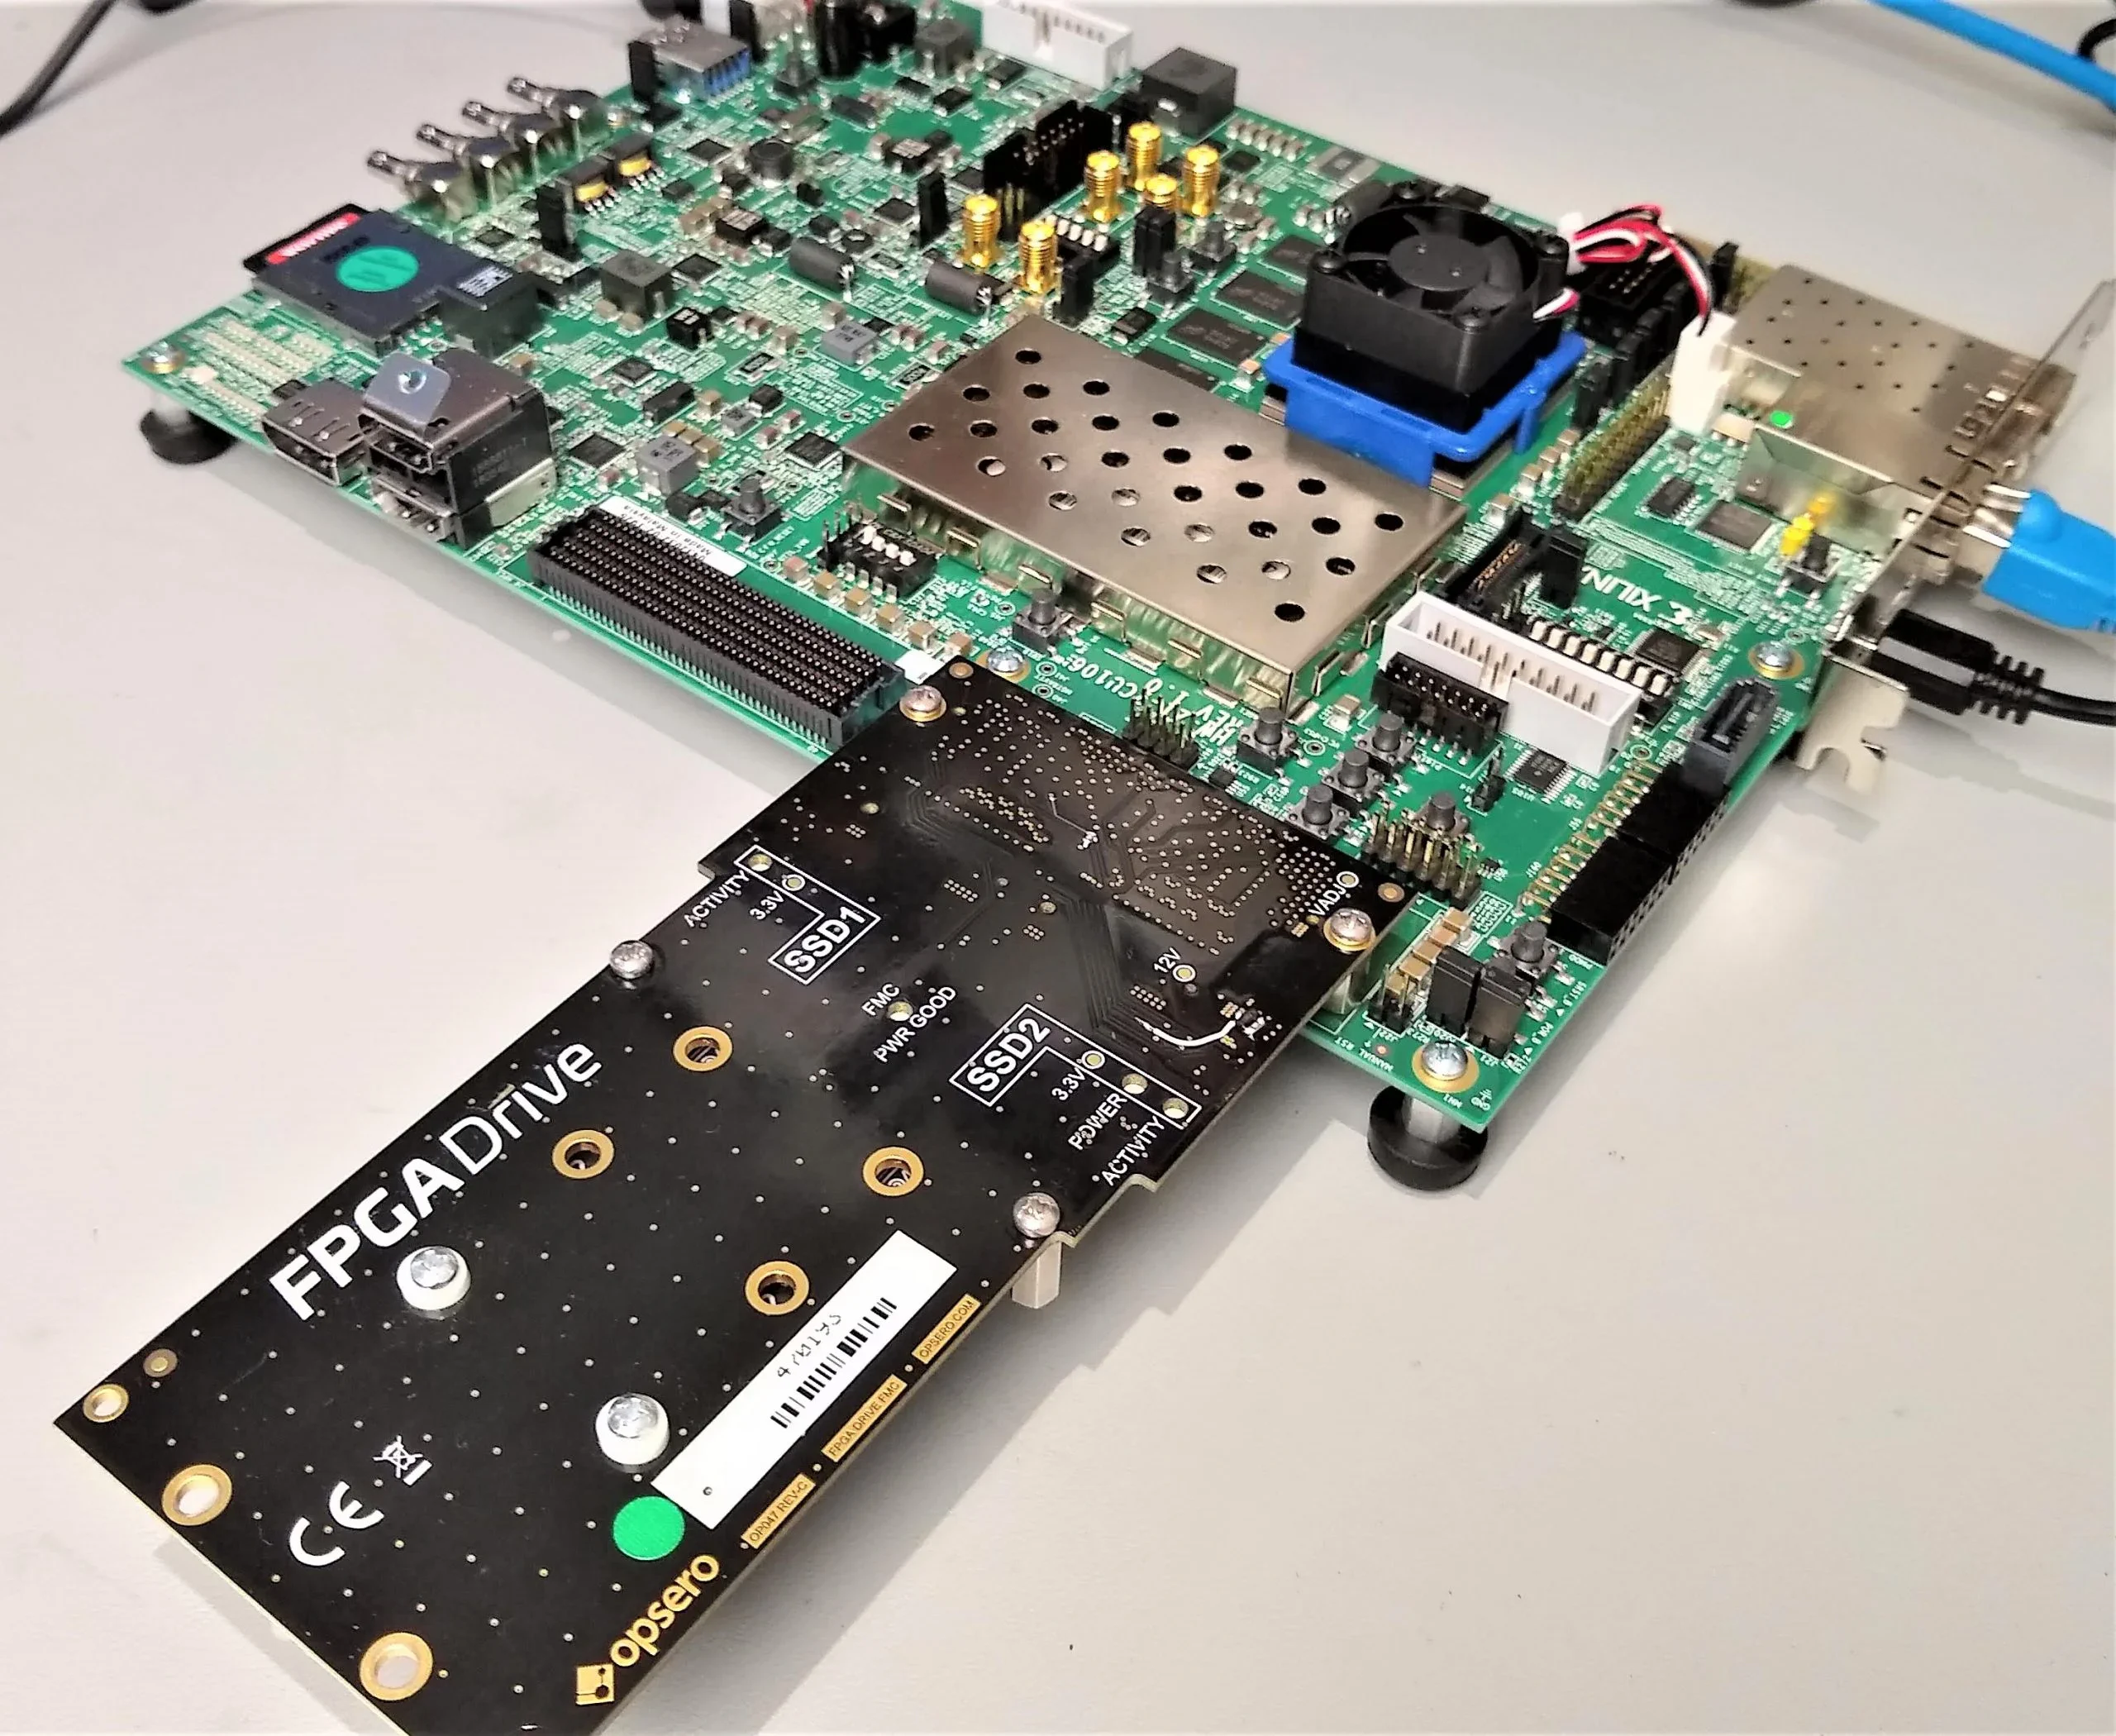
Probably the most common question that I receive about our SSD-to-FPGA solution is: what are the maximum achievable read/write speeds? A complete answer to this question would require a whole other post, but instead for today I’m going to show you what speeds we can get with a simple but highly flexible setup that doesn’t use any paid IP. I’ve run some simple Linux scripts on this hardware to measure the read/write speeds of two Samsung 970 EVO M.2 NVMe SSDs. If you have our FPGA Drive FMC and a ZCU106 board, you will be able to download the boot files and the scripts and run this on your own hardware. Let’s jump first to the results.
In absolute terms, those are good speeds that will satisfy a lot of applications. The solution is simple and easy to work with because we’re accessing the drives from Linux. Also, the solution is reasonably priced because we’re not using any paid IP. In relative terms however, we need to consider that the Samsung 970 EVO SSDs are promoted as having read and write speeds of 3,500MB/s and 2,500MB/s respectively. This solution is really only achieving 34% of the read performance potential and 33% of the write performance potential. The bottleneck is due to the way the NVMe protocol is being implemented in this setup. We’re basically using the processor to implement NVMe - the work is being done by software in the Linux kernel. If you want to speed it up, you need to offload that work to the FPGA - you need what they call an NVMe Accelerator IP core.
If this simple setup is good enough for you, then try it yourself. You’ll need the ZCU106 board, the FPGA Drive FMC and 2x NVMe SSDs. Follow these instructions:
root and password rootNow once we’re logged into PetaLinux, you might notice that the SSDs have been automatically mounted to /run/media/nvme0n1p1
and /run/media/nvme1n1p1. Our next step is to download some bash scripts and run them.
wget "https://download.opsero.com/nvme-ssd-speed-test/speed_test.tar.gz"tar -xvzf speed_test.tar.gzchmod 755 *_testbash speed_testHere’s what my terminal output looks like:
root@zcu106_fpgadrv_2020_2:~# wget "https://download.opsero.com/nvme-ssd-speed-test/speed_test.tar.gz"
Connecting to fpgadeveloper.com (172.81.116.20:80)
speed_test.tar.gz    100% |********************************|   667  0:00:00 ETA
root@zcu106_fpgadrv_2020_2:~# tar -xvzf speed_test.tar.gz
dual_read_test
dual_write_test
single_read_test
single_write_test
speed_test
root@zcu106_fpgadrv_2020_2:~# chmod 755 *_test
root@zcu106_fpgadrv_2020_2:~# bash speed_test
-----------------------------------------------------------
Speed tests for ZCU106 and FPGA Drive FMC with 2x NVMe SSDs
-----------------------------------------------------------
Single SSD Write:
  - Data:  4GBytes
  - Delay: 4.814 seconds
  - Speed: 830.91 MBytes/s
Single SSD Read:
  - Data:  4GBytes
  - Delay: 3.347 seconds
  - Speed: 1195.1 MBytes/s
Dual SSD Parallel Write:
  - Data:  8GBytes
  - Delay: 4.845 seconds
  - Speed: 1651.19 MBytes/s
Dual SSD Parallel Read:
  - Data:  8GBytes
  - Delay: 3.368 seconds
  - Speed: 2375.3 MBytes/s
root@zcu106_fpgadrv_2020_2:~#
The bash scripts are shown below. We are basically using one script per test and we use a fifth script to run each of the tests
and measure the time taken on each script. Single write test Uses dd to create a 4GB file on a single SSD. Note we call
sync at the end because the write isn’t completely finished until sync returns.
#/bin/bash
# Single write test

dd if=/dev/zero of=/run/media/nvme0n1p1/test.img bs=4M count=1000 oflag=direct
sync
Single read test Uses dd to read the 4GB file that was created by the write test.
#/bin/bash
# Single read test

dd if=/run/media/nvme0n1p1/test.img of=/dev/null bs=4M count=1000 iflag=direct
Dual write test Uses dd to create a 4GB file on each SSD (total of 8GB stored). To do these writes in parallel, we create
two separate processes by using the & symbol, and we use the wait command to wait until the processes have finished. We
call sync at the end because the writes aren’t completely finished until sync returns.
#/bin/bash
# Dual write test (parallel)

dd if=/dev/zero of=/run/media/nvme0n1p1/test.img bs=4M count=1000 oflag=direct &
dd if=/dev/zero of=/run/media/nvme1n1p1/test.img bs=4M count=1000 oflag=direct &
wait
sync
Dual read test Uses dd to read the 4GB files that were created by the dual write test. We again have to use the wait
command to wait until the processes have finished.
#/bin/bash
# Dual read test (parallel)

dd if=/run/media/nvme0n1p1/test.img of=/dev/null bs=4M count=1000 iflag=direct &
dd if=/run/media/nvme1n1p1/test.img of=/dev/null bs=4M count=1000 iflag=direct &
wait
Speed test This main script runs each of the above scripts and measures the time taken to run them. It then calculates the
throughput by taking the amount of data read/written and dividing by the delay in seconds. Note that each write test ends with
a call to sync to ensure that the write was truly completed, and each read test is preceded by a flush of the disk cache to
ensure that true read time is measured.
#/bin/bash

TIMEFORMAT=%R
echo "-----------------------------------------------------------"
echo "Speed tests for ZCU106 and FPGA Drive FMC with 2x NVMe SSDs"
echo "-----------------------------------------------------------"

echo "Single SSD Write:"
echo "  - Data:  4GBytes"
delay="$(time ( bash single_write_test >& /dev/null ) 2>&1 1>/dev/null )"
echo "  - Delay: $delay seconds"
echo "  - Speed: $(dc -e "4000 $delay / p") MBytes/s"

# Flush the disk cache before performing read test
echo 3 > /proc/sys/vm/drop_caches 1>/dev/null
echo "Single SSD Read:"
echo "  - Data:  4GBytes"
delay="$(time ( bash single_read_test >& /dev/null ) 2>&1 1>/dev/null )"
echo "  - Delay: $delay seconds"
echo "  - Speed: $(dc -e "4000 $delay / p") MBytes/s"

echo "Dual SSD Parallel Write:"
echo "  - Data:  8GBytes"
delay="$(time ( bash dual_write_test >& /dev/null ) 2>&1 1>/dev/null )"
echo "  - Delay: $delay seconds"
echo "  - Speed: $(dc -e "8000 $delay / p") MBytes/s"

# Flush the disk cache before performing read test
echo 3 > /proc/sys/vm/drop_caches 1>/dev/null
echo "Dual SSD Parallel Read:"
echo "  - Data:  8GBytes"
delay="$(time ( bash dual_read_test >& /dev/null ) 2>&1 1>/dev/null )"
echo "  - Delay: $delay seconds"
echo "  - Speed: $(dc -e "8000 $delay / p") MBytes/s"