Gigabit Ethernet can be a very useful medium for transferring data very quickly from one point to another. It’s low-cost, high-bandwidth, well established technology and the cabling is easily obtained and installed. In embedded applications however, the throughput of Ethernet links is often held back by one thing: the processor. When using an FPGA, we can relieve the processor significantly by offloading work to the FPGA fabric, but often the only way to exploit the full potential of a Gigabit Ethernet link is to do away with the processor altogether.
Apart from increased throughput, a processor-less design can also be more robust and more secure. Processors and software add a layer of complexity to any design; removing that layer sacrifices flexibility but often leads to a more robust design. Furthermore, and of particular importance in today’s world of interconnected devices, processors can be hacked and they can hand over the power to make significant changes to the functioning of any device. Processor-less designs are much more difficult to hack, and often impossible to hack remotely.
Hang on, don’t we need the processor?
In most applications, you can’t just pull the processor out of the equation. Typically the processor is what brings up the MAC and the PHY, it’s running the TCP/IP stack and it’s managing the flow of data through the port(s). Yes, all of these things can be offloaded to an FPGA, but at the cost of flexibility, and in most applications, that flexibility can’t be sacrificed. However there are some applications where we absolutely need to maximize throughput, or security, and in these applications the best solution has no processor.
A base design
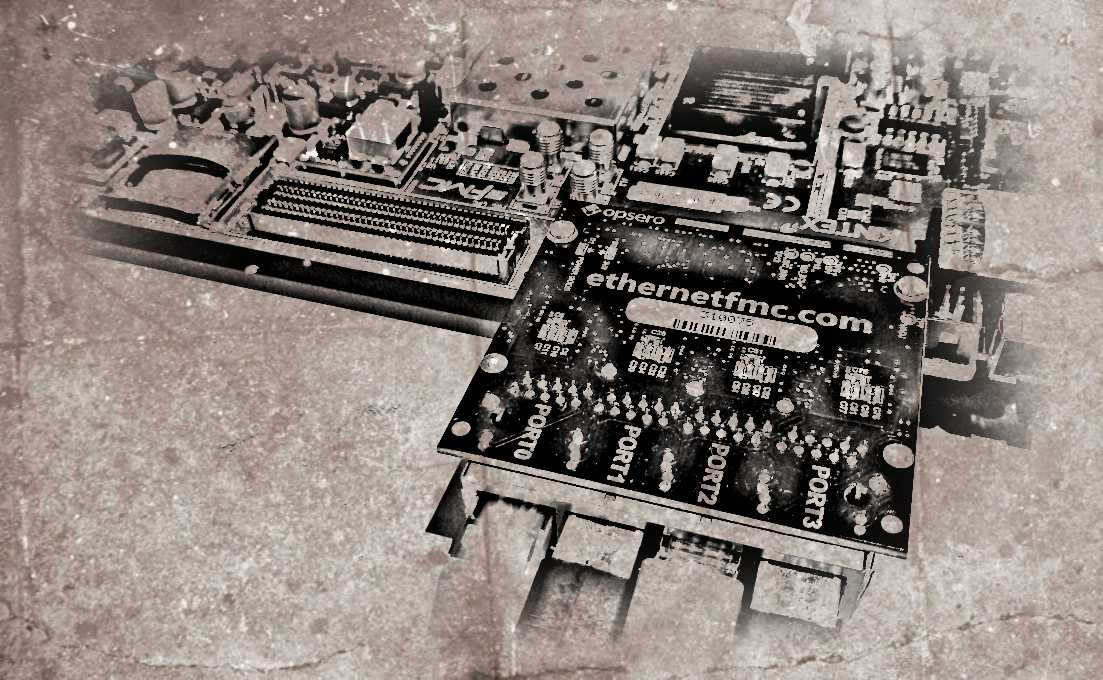
So how would you go about developing such a system? Luckily, Xilinx provides us with a functional starting point for developing a processor-free Ethernet device. In this post we’re going to generate the example design for the Xilinx Tri-mode Ethernet MAC, which provides everything we need to drive an Ethernet port entirely from the FPGA fabric (ie. without a processor). The example design is specifically designed for the KC705 board and it connects to the on-board Ethernet port. I’m also going to show you how you can modify the design so that it works with the Ethernet FMC, opening up the potential to drive 4x Gigabit Ethernet ports simultaneously, and all without a processor.

The block diagram above shows the various elements of the example design and where they physically reside. Here is a basic description of the significant blocks and their purpose in the design:
- TEMAC: The Tri Mode Ethernet MAC implements the MAC (media access control) layer of the IP stack, a sublayer of the data link layer.
- AXI-lite Control State Machine: The state machine performs basic transactions over the AXI-lite interface of the TEMAC IP to bring up the MAC and the external Ethernet PHY to allow basic frame transfer.
- Pattern Generator/Checker and Address Swap: This block implements a loopback whereby received frames are sent back to the transmitter after having their source and destination MAC addresses swapped. It also implements a packet generator and packet checker which can be used to test a link between multiple ports.
- AXI-Streaming FIFOs: The FIFOs add buffering between the TEMAC and the packet generator/checker.
What you’ll need
To go through this tutorial, you’ll need the following:
- Vivado (I used 2020.2, but other versions should also work)
- Evaluation licence for the TEMAC IP
- KC705 Evaluation board (to test on hardware)
- Ethernet FMC (to test on hardware)
- PC with Ethernet port and Wireshark installed
Generate the TEMAC IP
We use Vivado to generate the TEMAC IP using these steps:
- Launch Vivado.
- Select “Create Project”.
- Give the project a name (eg. “kc705_temac”) and a location. Click Next.

- Select “RTL project” and “Do not specify sources at this time”. Click Next.

- Select the “Boards” tab and type “kc705” in the search bar. Select the KC705 and click Next.

- From the “Project Manager” click on “IP Catalog”.
- In the search bar for the “IP Catalog”, type “tri mode” and double click on the “Tri Mode Ethernet MAC” IP.

- In the customization options, in the “Board” tab, select “ETHERNET->rgmii” and “MDIO->mdio io”.

- In the “Data rate” tab, the 1Gbps option should be selected and grayed.

- In the “Interface” tab, use the settings show in the image below.

- In the “Shared logic” tab, select “Include shared logic in example design”.

- In the “Features” tab, use the following settings.

- Click OK to complete the IP configuration and then click “Generate” to generate output products. This should
take a few minutes.

Generate the TEMAC example design
After the TEMAC IP output products have been built, we can now generate the example design.
- Click on the “IP Sources” tab. You should see the TEMAC IP listed with the name
tri_mode_ethernet_mac_0. - Right click on the TEMAC IP, and select “Open IP Example Design”.

- Specify a location for the TEMAC Example design. It will be placed in a folder called
tri_mode_ethernet_mac_0_exand we can’t change this, so you must make sure that you choose a location where a folder of that name does not already exist (ie. if you’ve run this before, don’t use the same location as your earlier project or it will be overwritten!).
- Vivado will generate the example design and it will open the project in another instance of Vivado. From this point, we can close the first instance of Vivado in which we created the TEMAC IP - we won’t need it from here. The following steps should be performed in the new Vivado instance - the one with the example design.
- We can generate the bitstream for the example design by clicking “Generate Bitstream”. It will take several minutes.

Testing the example design
Before testing the example design, we should take a look at how the design works. The best documentation on the example design can be found in the TEMAC product guide. If you intend on modifying the design in any way, I suggest you read through the product guide. The state machine flow diagram in Chapter 5 is particularly useful.
To use the example design, we basically connect up the Ethernet port to a PC and use the DIP switches and pushbuttons on the KC705 to control the operation. The DIP switch (SW4) is used to control the link speed and to enable/disable the pattern generator and checker.
| SW4 | Function |
|---|---|
| 1 | MAC Speed(0) |
| 2 | MAC Speed(1) |
| 3 | Enable Pattern Generator |
| 4 | Enable Pattern Checker |
The link speed can be set using SW4 switches 1 and 2 as shown in the table below.
| MAC Speed(0) | MAC Speed(1) | Link speed |
|---|---|---|
| 0 | 0 | 10Mbps |
| 1 | 0 | 100Mbps |
| X | 1 | 1000Mbps |
The pushbuttons can be used to trigger a link speed update or an error count reset:
| Pushbutton | Function |
|---|---|
| NORTH/TOP | Reset error count |
| CENTER | Update link speed |
Once the bitstream has been generated, we can test it on our KC705 board using its on-board Ethernet port.
- Connect the KC705 Ethernet port to a PC and launch Wireshark.

- Set the KC705 DIP switch (SW13) to 00101 to specify JTAG boot mode.

- Connect a USB cable between the KC705’s JTAG port and your PC running Vivado.
- Set the KC705 DIP switch (SW4) to 0100 to specify 1Gbps link speed and to disable the packet generator
and packet checkers.

- Power up the KC705 board.
- In Vivado, click “Open Hardware Manager”.
- Click “Open target” and then “Autoconnect”.

- Vivado should find the connected FPGA. Click “Program device”. In the window that opens, we need to select the
bitstream, but the correct one should already be selected by default:
tri_mode_ethernet_mac_0_ex/tri_mode_ethernet_mac_0_ex.runs/impl_1/tri_mode_ethernet_mac_0_example_design.bit. Click “Program”.
- When the FPGA has been programmed, you should notice that the “DONE” LED on the KC705 board is lit (near the power switch).
Now press the center pushbutton to force the board to update the link speed to the one that we specified
on DIP switch SW4.

When the link is brought back up, the link speed should be as we specified. You can confirm this by checking the LEDs on the panel alongside the Ethernet port. You should also notice that the transit and receive LEDs are now flashing at the same time. This is because the FPGA is echoing all of the packets that it receives, swapping the source and destination MAC addresses. You can also confirm this in Wireshark.
Modifying the design for the Ethernet FMC
This design can be modified so that it works with the Ethernet FMC, the objective being that you could expand the design to drive 4x Ethernet ports, effectively quadrupling the potential throughput. To do this, we need to change two things: the AXI-lite state machine and the pin constraints.
Modifying the AXI-lite state machine
This SM is designed to bring up the MAC and attached PHY to allow basic packet transfer in both directions. We need to modify the part of the SM that configures the PHY, because we want it to work with the 88E1510 PHY on the Ethernet FMC. In particular, we need to disable the TX clock skew in the PHY. This is actually done by the existing code, but in the 88E1510 PHY the location of the setting is slightly different. In our case, we need to write to the “MAC Specific Control Register 2” (register 21 on page 2).
The source code for the AXI-lite state machine can be found in the example design at this location:
tri_mode_ethernet_mac_0_ex/imports/tri_mode_ethernet_mac_0_axi_lite_sm.v
- Change the PHY address to 0 (this is a hardwired address on the Ethernet FMC). Locate
localparam PHY_ADDRin the file and replace it with this:
localparam PHY_ADDR = 8'h0;
- Add parameters for the “page address” and “MAC Specific Control Register 2” registers. To write to a register on page 2, we need to first write 2 to the “page address” register (register 22). Add these lines just below the one you just added:
localparam PHY_PAGE_ADDR_REG      = 8'h16;
localparam PHY_MAC_CTL2_REG       = 8'h15;
- Add two state enumerations:
MDIO_PAGE_SETandMDIO_PAGE_RST. Find the existing state enumerations in the code and add the two new ones as shown below:
localparam  STARTUP               = 0,
           UPDATE_SPEED          = 1,

           MDIO_RD               = 2,
           MDIO_POLL_CHECK       = 3,
           MDIO_1G               = 4,
           MDIO_10_100           = 5,
           MDIO_RGMII_RD         = 6,
           MDIO_RGMII_RD_POLL    = 7,
           MDIO_RGMII            = 8,
           MDIO_DELAY_RD         = 9,
           MDIO_DELAY_RD_POLL    = 10,
           MDIO_DELAY            = 11,
           MDIO_RESTART          = 12,
           MDIO_LOOPBACK         = 13,
           MDIO_STATS            = 14,
           MDIO_STATS_POLL_CHECK = 15,
           RESET_MAC_TX          = 16,
           RESET_MAC_RX          = 17,
           CNFG_MDIO             = 18,
           CNFG_FLOW             = 19,
           CNFG_FILTER           = 22,
           CNFG_FRM_FILTER_1     = 31,
           CNFG_FRM_FILTER_2     = 32,
           CNFG_FRM_FILTER_3     = 33,
           CNFG_FRM_FILTER_MASK_1      = 34,
           CNFG_FRM_FILTER_MASK_2      = 35,
           CNFG_FRM_FILTER_MASK_3      = 36,
           CHECK_SPEED           = 25,
           MDIO_PAGE_SET         = 40,
           MDIO_PAGE_RST         = 41;
- Find the
MDIO_RGMIIstate and change lineaxi_state <= MDIO_DELAY_RD;toaxi_state <= MDIO_PAGE_SET;. Then add theMDIO_PAGE_SETstate to the state machine by pasting the following code afterend.
         MDIO_PAGE_SET : begin
            // set page to 2
            $display("** Note: Setting page to 2");
            start_mdio     <= 1;
            mdio_reg_addr  <= PHY_PAGE_ADDR_REG;
            mdio_op        <= MDIO_OP_WR;
            axi_wr_data    <= 32'h2;
            axi_state      <= MDIO_DELAY_RD;
         end
- Find the
MDIO_DELAY_RDstate and replacePHY_MODE_CTL_REGwithPHY_MAC_CTL2_REG. - Find the
MDIO_DELAY_RD_POLLstate and replace the assignment ofaxi_wr_datawith the following. This disables the TX clock skew and leaves the RX clock skew enabled (it is enabled by default).
axi_wr_data <= {16'h0000, axi_rd_data[15:6], 2'b10, axi_rd_data[3:0]}; // force bit 5 to 1 and 4 to 0
- Find the
MDIO_DELAYstate and replacePHY_MODE_CTL_REGwithPHY_MAC_CTL2_REG. - In the same state, change line
axi_state <= MDIO_RESTART;toaxi_state <= MDIO_PAGE_RST;. Then add theMDIO_PAGE_RSTstate to the state machine by pasting the following code afterend.
         MDIO_PAGE_RST : begin
            // set page back to 0
            $display("** Note: Setting page back to 0");
            start_mdio     <= 1;
            mdio_reg_addr  <= PHY_PAGE_ADDR_REG;
            mdio_op        <= MDIO_OP_WR;
            axi_wr_data    <= 32'h0;
            axi_state      <= MDIO_RESTART;
         end
If you have trouble following the modification instructions, you can download my version for 2020.2 here.
Modifying the pin constraints
To use this design with the Ethernet FMC, we need to swap the pin constraints from the on-board Ethernet
port to the first port of the Ethernet FMC. The pin constraints are located in this file:
tri_mode_ethernet_mac_0_ex/imports/tri_mode_ethernet_mac_0_example_design.xdc
Open the file in a text editor and paste the following constraints to the end of the file.
Note that these pins already have constraints in this file, but by placing these constraints
at the end of the file we are overriding the existing ones. If you like, you can remove or
comment out the previous PACKAGE_PIN constraints for these pins from the file.
set_property PACKAGE_PIN F30      [get_ports phy_resetn]

set_property PACKAGE_PIN G29      [get_ports mdc]
set_property PACKAGE_PIN G30      [get_ports mdio]

set_property PACKAGE_PIN H27      [get_ports rgmii_rxd[3]]
set_property PACKAGE_PIN H26      [get_ports rgmii_rxd[2]]
set_property PACKAGE_PIN H25      [get_ports rgmii_rxd[1]]
set_property PACKAGE_PIN H24      [get_ports rgmii_rxd[0]]

set_property PACKAGE_PIN E28      [get_ports rgmii_txd[3]]
set_property PACKAGE_PIN E30      [get_ports rgmii_txd[2]]
set_property PACKAGE_PIN E29      [get_ports rgmii_txd[1]]
set_property PACKAGE_PIN G28      [get_ports rgmii_txd[0]]

set_property PACKAGE_PIN D28      [get_ports rgmii_tx_ctl]
set_property PACKAGE_PIN F28      [get_ports rgmii_txc]

set_property PACKAGE_PIN B25      [get_ports rgmii_rx_ctl]

set_property PACKAGE_PIN C25      [get_ports rgmii_rxc]
You can download my version of the constraints for 2020.2 here.
Build and test the modified design
When you have made the modifications above, you can run “Generate Bitstream” again. To test it out on hardware, follow these steps:
- With the KC705 board turned OFF, plug the Ethernet FMC into the HPC FMC connector of the KC705.
- Connect an Ethernet cable between port 0 of the Ethernet FMC and your PC.

- Set the KC705 DIP switch (SW13) to 00101 to specify JTAG boot mode.
- Connect a USB cable between the KC705’s JTAG port and your PC running Vivado.
- Set the KC705 DIP switch (SW4) to 0100 to specify 1Gbps link speed and to disable the packet generator
and packet checkers.
- Power up the KC705 board.
- In Vivado, click “Open Hardware Manager”.
- Click “Open target” and then “Autoconnect”.
- Vivado should find the connected FPGA. Click “Program device”. In the window that opens, we need to select the
bitstream, but the correct one should already be selected by default:
tri_mode_ethernet_mac_0_ex/tri_mode_ethernet_mac_0_ex.runs/impl_1/tri_mode_ethernet_mac_0_example_design.bit. Click “Program”. - When the FPGA has been programmed, you should notice that the “DONE” LED on the KC705 board is lit (near the power switch).
Now press the center pushbutton to force the board to update the link speed to the one that we specified
on DIP switch SW4.
With this modified design, we can no longer verify the link speed using the LEDs on the KC705 (next to the on-board Ethernet port), as they are driven directly by the on-board PHY. However, we can verify the link speed by checking the network status on the connected PC, and we can verify the returned packets using Wireshark.
What next?
At this point you have a single Gigabit Ethernet port of the Ethernet FMC that is being driven entirely by the FPGA. From here, I see three interesting ways to build on this design:
- by extending this to more Ethernet ports,
- by designing some packet processing (eg. filtering) and
- by adding an FPGA implemented IP stack
To extend this to more ports of the Ethernet FMC, you would have to modify the top level source of
the design (imports/tri_mode_ethernet_mac_0_example_design.v) such that it instantiates a single TEMAC and
support logic for each of the ports that you want to use. This process isn’t suited for a tutorial, however
for those interested, I am currently working on turning this into a design that supports more development boards,
and of course all of the 4x ports of the Ethernet FMC. When it’s ready I’ll post the link to the Github repository here.
Update: This has become a 3 part tutorial (you’ve just read the 1st) so checkout the rest if you’re still interested:
- Driving Ethernet Ports without a processor (this post)
- Processorless Ethernet: Part 2
- Processorless Ethernet: Part 3 Also, you can now run this example design on a few different FPGA development boards using all 4 ports of the Ethernet FMC. Here is the Git repository for Processorless Ethernet on FPGA.