With FPGA Drive we can connect an NVM Express SSD to an FPGA, but what kind of real-world read and write speeds can we achieve with an FPGA? The answer is: it depends. The R/W speed of an SSD depends as much on the SSD as it does on the system it’s connected to. If I connect my SSD to a 286, I can’t expect to get the same performance as when it’s connected to a Xeon. And depending on how it’s configured, the FPGA can be performing more like a Xeon or more like a 286. To get the highest performance from the SSD, the FPGA must be a pure hardware design, implementing NVMe protocol in RTL to minimize latency and maximize throughput. But that’s hard work, and not very flexible, which is why most people will opt for the less efficient configuration whereby the FPGA implements a microprocessor running an operating system. In this configuration, we typically wont be able to exploit the full bandwidth of NVMe SSDs because our processor is just not powerful enough.
[Read More]Useful Links
Device
- PicoZed 7010: Zynq™-7000 SoC XC7Z010-1CLG400
- PicoZed 7015: Zynq™-7000 SoC XC7Z015-1CLG485
- PicoZed 7020: Zynq™-7000 SoC XC7Z020-1CLG400
- PicoZed 7030: Zynq™-7000 SoC XC7Z030-1SBG485
Configuration
Boot mode is determined by DIP switch labelled SW1.
| Boot mode | 1 | 2 |
|---|---|---|
| JTAG | 0 | 0 |
| Quad-SPI | 0 | 1 |
| SD Card | 1 | 1 |
Notes:
- 0 = OFF (away from pin 1)
- 1 = ON (towards pin 1)
- Cascaded JTAG can be enabled by placing a jumper between pins 1 and 2 of JT4
- Independent JTAG can be enabled by placing a jumper between pins 2 and 3 of JT4
Avnet releases PicoZed FMC Carrier Card V2
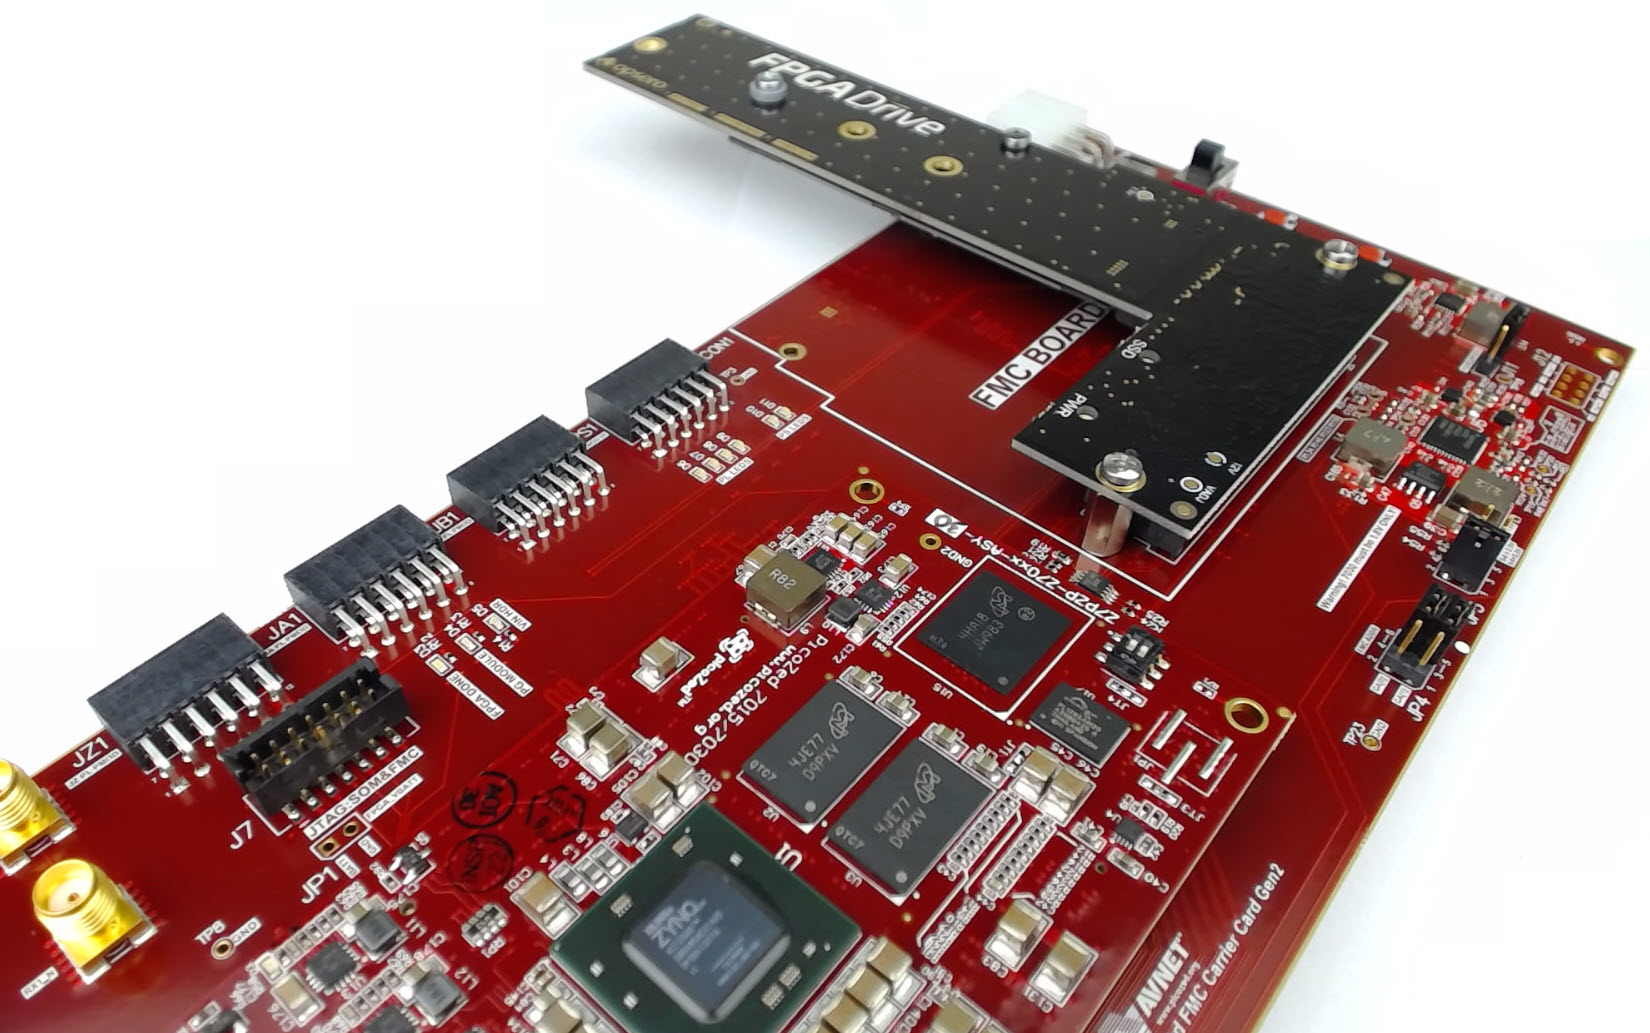
For those of you who were interested in running my recent tutorials about connecting a PCIe SSD to the Zynq (Zynq PCI Express Root Complex design in Vivado and Connecting an SSD to an FPGA running PetaLinux) you’ll be happy to know that Avnet has released the PicoZed FMC Carrier Card V2, which is the platform on which those tutorials were based.
For more information about the new PicoZed carrier, check out their video - and keep an eye out at 1m:32s where the Ethernet FMC gets a mention!
[Read More]Connecting an SSD to an FPGA running PetaLinux
This is the final part of a three part tutorial series on creating a PCI Express Root Complex design in Vivado and connecting a PCIe NVMe solid-state drive to an FPGA.
Part 1: Microblaze PCI Express Root Complex design in Vivado
Part 2: Zynq PCI Express Root Complex design in Vivado
Part 3: Connecting an SSD to an FPGA running PetaLinux (this tutorial)
In this final part of the tutorial series, we’ll start by testing our hardware with a stand-alone application that will verify the status of the PCIe link and perform enumeration of the PCIe end-points. We’ll then run PetaLinux on the FPGA and prepare our SSD for use under the operating system. PetaLinux will be built for our custom hardware using the PetaLinux SDK and the Vivado generated hardware description. Using Linux commands, we will then create a partition, a file system and a file on the solid-state drive.
[Read More]Zynq PCI Express Root Complex design in Vivado
This is the second part of a three part tutorial series in which we will create a PCI Express Root Complex design in Vivado with the goal of connecting a PCIe NVMe solid-state drive to our FPGA.
Part 1: Microblaze PCI Express Root Complex design in Vivado
Part 2: Zynq PCI Express Root Complex design in Vivado (this tutorial)
In this second part of the tutorial series, we will build a Zynq based design targeting the PicoZed 7Z030 and PicoZed FMC Carrier Card V2. In part 3, we will then test the design on the target hardware by running a stand-alone application which will validate the state of the PCIe link and perform enumeration of the PCIe end-points. We will then run PetaLinux on the FPGA and prepare our SSD for use under the operating system.
[Read More]PicoZed Unboxing
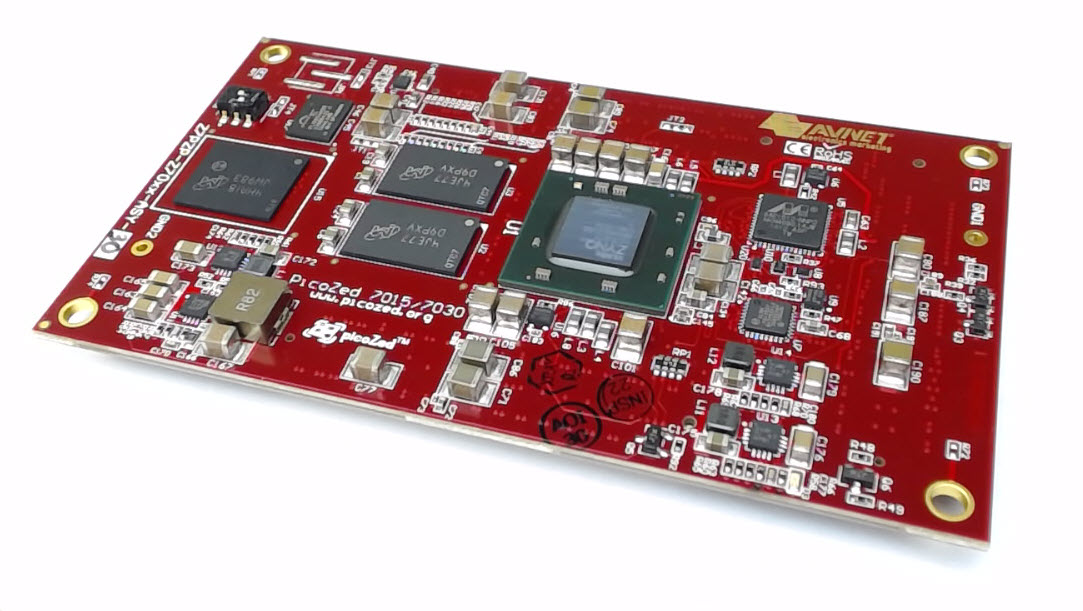
I recently got myself a PicoZed 7Z030 SoM (system-on-module) so that I could start developing more resource intensive applications for the Ethernet FMC, such as network tapping and network latency measurement. Why would I use a SoM for this? Checkout my comparison of Zynq SoMs to learn more about the benefits of SoMs in product development.
It’s worth mentioning this arrived the day after I ordered it. Here are some photos I took while unboxing:
[Read More]Comparison of Zynq SoMs
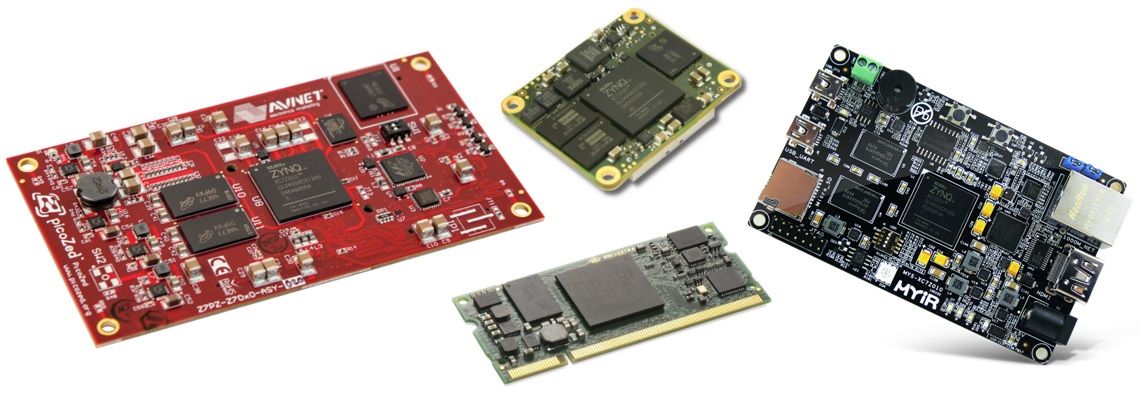
In the last year or so, there has been an explosion in the availability of System-on-Modules (SoMs) featuring the popular FPGA+ARM combo Zynq-7000 SoC from Xilinx. I’ve always promoted the idea that FPGAs and SoCs allow for faster design cycles and rapid proof-of-concept, but these SoMs take that advantage to another level. Let me explain why. In the past, I would handle most projects by doing a proof-of-concept on an evaluation board, then designing a custom board that integrates all the required components onto a single PCB. While this process is fairly straightforward and minimizes my risk in designing the final custom board, it still has its drawbacks:
[Read More]Comparison of Zynq boards
If you’re interested in testing out the Zynq-7000 SoC from Xilinx there are now quite a few options available, so it comes down to a question of features vs price. Below I’ve listed the most important features of the available boards side-by-side to help you make the right decision for yourself or your company. I’ll also go into what I think of each board before we look at the boards in terms of their popularity.
[Read More]