Title here
Summary here
A tech blog on FPGA design by Jeff Johnson
And making it run on start-up
September 21, 20233 minutes
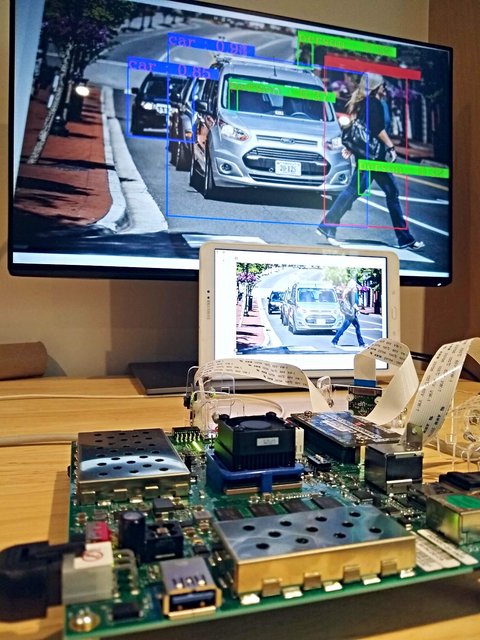
Using a Raspberry Pi camera
July 12, 202312 minutes
Docker, Ubuntu and PetaLinux put to the test
July 10, 202310 minutes
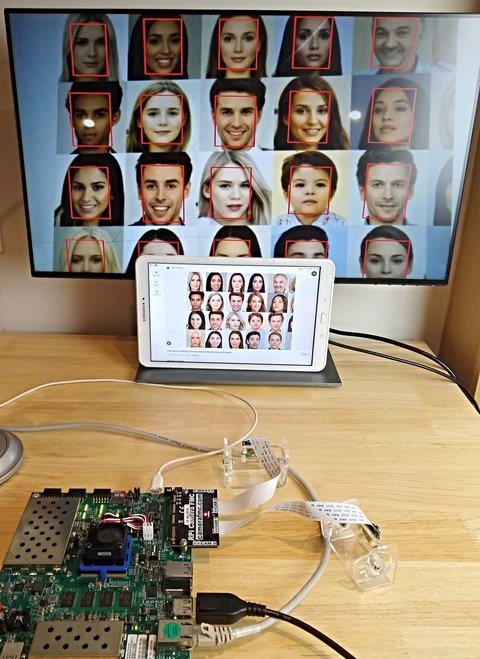
Using Raspberry Pi cameras
July 5, 202310 minutes

Using Certified Ubuntu 22.04 LTS for Xilinx devices
June 15, 202315 minutes
With the objective of customizing it
May 19, 202313 minutes
Guide to downloading and running Certified Ubuntu 20.04 LTS on the ZCU106 board
May 18, 20235 minutes
On Ubuntu 20.04
May 11, 20234 minutes

Introducing the Camera FMC product line for connecting MIPI cameras to FPGA development boards
March 1, 20235 minutes
Preview of the RPi Camera FMC for connecting 4 Raspberry Pi cameras to Zynq UltraScale+ boards
February 3, 20233 minutes